
Perfect angel food cake
with
Warm amaretto peach sauce
perfect angel food cake
with warm bourbon amaretto peach sauce
for Perfect Angel Food Cake
for Warm Bourbon Amaretto Peach Sauce
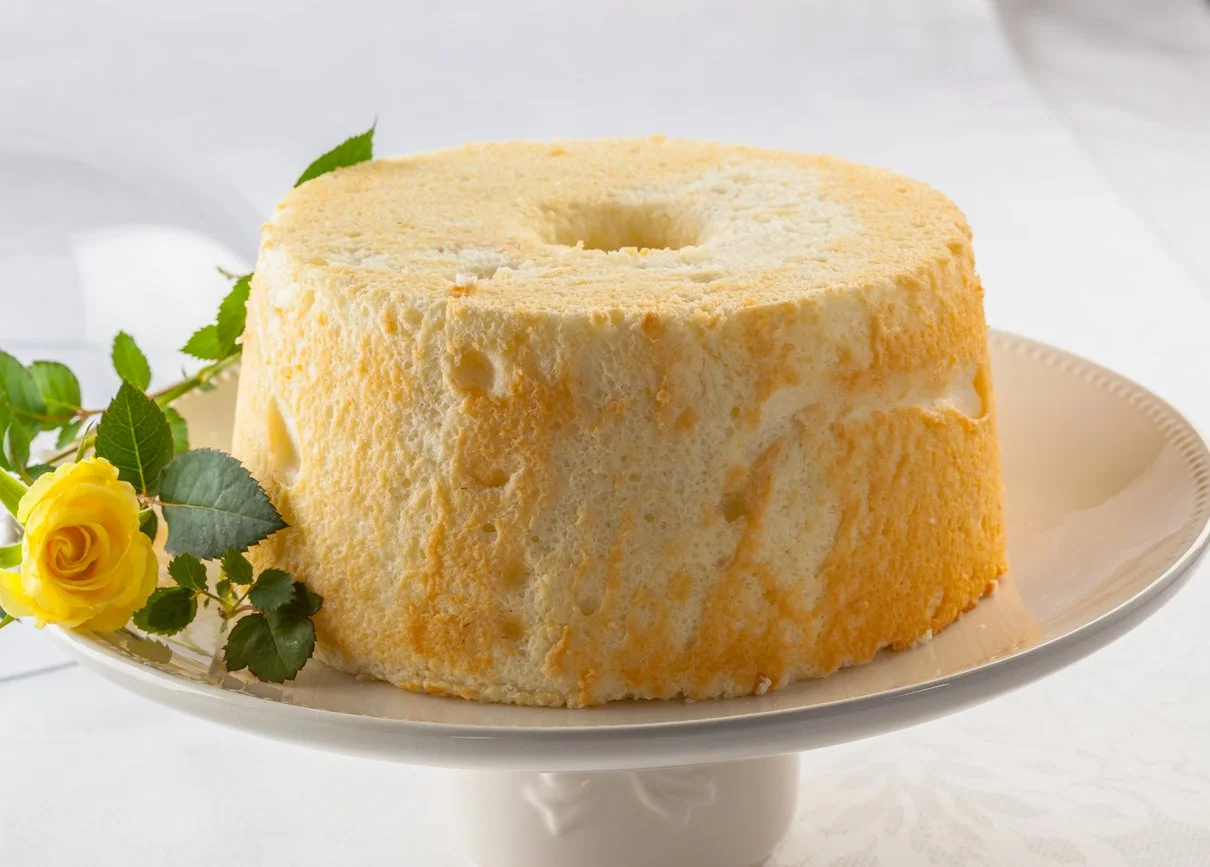
The Perfect Angel Food Cake is light and airy without being dry, rubbery, or overly sweet. Perfect as is; even better topped with this sophisticated fruit sauce that will have you struggling not to lick the plate…which would be most unsophisticated….
Summertime is the perfect time for angel food cake. When temperatures climb we want a dessert that’s light but also satisfying. And, it’s the perfect time for juicy peaches, which are perfectly ripe right now.
That makes this the perfect time to bake a Perfect Angel Food Cake with Warm Bourbon Amaretto Peach Sauce! That said, pretty much all fruits are available year round, so don’t hesitate to make this in the dead of winter, and bring a little sunshine into your day.
First, some tips and tricks to make sure that your angel food cake is perfect.
What makes this cake angelic? Is it food for angels? Perhaps it’s because it’s as light as a feather from an angel’s wing. Or, perhaps it’s a because it’s a dessert without that sinful (read: high calorie) ingredient found in most treats—fat.
No butter. No oil. No egg yolks. Just flour, egg whites, and sugar (basically).
For those who are used to making Passover cakes, in which no leavening is permitted, seeing a cake rise high with only beaten egg whites is no surprise. Like Passover cakes, angel food cake uses no baking powder or baking soda. It does, however, use flour.
Baking an angel food cake with my paternal grandmother was my first introduction to beating egg whites. As I watched the clear, yellow-tinged goop turn into thick, shiny, billowy clouds, I was sure I was witnessing magic. And I can still remember my first bite of that cake. I recently found her recipe, written in cursive on a little card, the ink beginning to fade…wedged between two cookbooks. This is basically her recipe, with just a couple of twists.
Angel food cake isn’t always perfect. It can be dry, rubbery, and too sweet, or have a flat, one-note flavor. At least, that’s what I’ve experienced with angel food cake from the supermarket.
None of those terms can be used to describe this one. Because this one is perfect.
There are a few things that make it thus.
First…taste. I believe that just about anything can benefit from the flavor of pure vanilla. I love using it on its own, but it’s also great to use it as a base, upon which you can build other flavors. That’s what I’m doing here. The addition of pure almond extract in the cake complements the amaretto in the peach sauce perfectly, and the vanilla backbeat actually enhances and enriches the almond flavor.
Some bakers use lemon juice rather than cream of tartar to stabilize the meringue. I use cream of tartar, but I also add a tablespoon of lemon juice. It’s not enough lemon to make the cake taste lemony. Lemony angel food cake can be a very nice thing, but it’s not the flavor profile I’m going for here. The tablespoon of fresh lemon juice is just enough to give it a bit of a lift and brighten the flavor.
There’s also what I do to the sugar…more on that, soon.
Then…there’s texture. To get that perfect texture that we’re aiming for, the way we whip those whites is critical. So is choosing the right flour and sugar. And the right pan.
So, let’s talk about those egg whites first. Accept no substitutes. This is one place where you don’t want to use a carton of pasteurized whites, or frozen whites, or powdered whites, or anything other than egg whites straight from their shells, that have been allowed to sit around to reach room temperature before being used—critical for the cake to rise properly.
It’s important to know that one teeny tiny drop of egg yolk or egg shell in your whites will ruin the cake. It won’t rise.
Get our your stand mixer, if you have one. This one is, in my opinion, the sovereign of home mixers. It’s an investment that will most likely last forever—I’ve had mine for over 30 years and it’s still chugging along.
An electric hand-held mixer is also fine. I have this one, and it’s perfect for when I’m cooking at someone else’s house and taking my big mixer would border on insane.
My grandma used a rotary beater with a crank. You had to really turn that crank to get those whites to where you want them, but it was fun. This looks almost exactly like the one Grandma had, except that the red handles on her’s were made of wood, not acrylic.
The failsafe method of separating the whites is to have a medium-sized bowl and a cup or small bowl next to your mixing bowl. Crack an egg and let the whites slip into the small bowl, then drop the yolk into the medium bowl. Now, pour the egg white from the cup into the mixing bowl. Do this for each egg, adding the yolk to the yolk bowl and adding the whites, one at a time, to the mixing bowl. That way, if you mess up you’ve only ruined one egg, not all of them.
You want to beat them to soft peaks. Get it right, and the whites will give you props and bow to you. That means you want them to rise nice and tall, but not become completely stiff. When you raise your beaters, the tip of the peak you leave behind should gently bend over. Over-beating will keep your cake from rising as well as it should, and it can also make the finished product dry. By the way, cover those yolks, quickly and tightly, and store them in the fridge for up to one day. Use them to make a beautiful custard, which in turn you can use to make a fabulous trifle with leftover angel food cake and a nice jam.
Now, let’s talk about the flour. You need to use cake flour. No substitutions. It’s all about the percentage of protein in the flour; AP flour will make your cake tough. If you don’t have cake flour, go get some or make something else. I’m a big fan of all King Arthur flours. The protein levels are dependable. It’s unbleached and without additives, which means it doesn’t have any weird tastes. Personally, I try to avoid overly processed foods and foods with artificial ingredients. They may be edible, but they’re not food. (I’m standing on my soapbox…)
Last but not least is the sugar. Remember I promised you we would talk about the sugar? Almost every recipe for angel food cake will tell you that superfine sugar is what you need for the texture of the cake to be right. This one is no different. If you haven’t got any, no worries. Just pour your regular granulated sugar into the food processor and whoosh it into superfine sugar.
But wait, there’s more…
I learned a trick from my brother-the-chef. It’s another step, but it’s worth it because it will add a wonderful complexity, as well as a hint of caramel, to the flavor of the cake.
Have you ever toasted sugar? I’m not talking about heating sugar in a saucepan until it melts into a beautiful liquid caramel. I’m talking about toasting it in the oven so that it develops a golden color while retaining its crystalized form. Since I learned to do this, my angel food cakes have been amazing.
Here’s how to toast sugar: Preheat the oven to 300°.
Grab a 4 lb bag of sugar from the grocery store. You want an unopened, unadulterated bag.
Pour the sugar into a 9” X 13” glass baking dish and spread it out evenly.
Place the dish into the preheated oven. Toast the sugar for 30 minutes; then stir and continue to let it bake for 30 minutes more.
This is where I stop. It adds an amazing flavor to the cake without affecting its white color.
You can, however, keep toasting the sugar for a total of 3—4 hours, stirring every so often. Longer than that, the sugar will start to melt and become something else. The longer it toasts, the deeper the flavor will be. Try using toasted sugar in your other recipes as well. It’s also great in fancy coffees.
And, it’s perfect for the Warm Bourbon Amaretto Peach Sauce!
Finally…All will be for naught without the right pan. You need to use a tube pan. I love this one. It’s made by Chicago Metallic, a tried and true brand in the baking industry. Easy to clean, doesn’t leak, and the little feet allow you to cool the cake without squishing the top. (Angel food cake cools upside down.)
Never grease the pan for angel food cake!
You’ll also need a good silicone spatula. It’s a great tool to have for folding ingredients and for scooping every last bit of batter from the bowl. I’ve been using the same Kitchen Aid spatula for 15 years and I’ve loved it. Unfortunately, I did something foolish and destroyed it ... I recently replaced it with this one and it’s great. I don’t know why the ones with colored handles are cheaper than the ones with a black handle…but I like color!
And now, without further ado, here’s the recipe for Perfect Angel Food Cake
Perfect angel food cake
Ingredients:
1 ⅔ cups toasted superfine sugar (334 g), divided. (See above for how to toast sugar.)
1 ⅛ cups unbleached cake flour (132g)
¼ teaspoon salt
12 large egg whites, at room temperature
1 ½ teaspoons cream of tartar
1 tablespoon lemon juice
2 teaspoons vanilla bean paste (or pure extract)
¾ teaspoon pure almond extract
Optional: confectioner’s sugar for dusting the top
Serve slices topped with Warm Amaretto Peach Sauce
Method:
Preheat the oven to 325° with a rack set in the lower middle position.
In a food processor, combine ⅔ cup of the sugar with the flour and salt. Pulse until aerated and light, about 10 pulses. Alternatively, combine these ingredients in a bowl and, using a mesh strainer or a sifter, sift them into another bowl. Sift back and forth from one bowl to the other, about 6 times.
Attach the whisk to your mixer and place the egg whites and the cream of tartar in the mixer bowl. Turn the mixer on to low-medium speed and whip until the whites are foamy, then increase the speed to medium.
With the mixer running, slowly add in the remaining cup of sugar. (if you add it fast it will go flying.)
Whip until the mixture turns fluffy and white, then add in the lemon juice and the two extracts.
Increase the speed and whip until shiny and soft peaks form. Watch it carefully and don’t over-beat the meringue. Remove the bowl from the mixer stand.
Using a mesh strainer, sift a little of the flour mixture over the whites. Very gently and slowly, using a rubber spatula, fold the flour into the whites—scoop up from the bottom and turn over the top, then rotate the bowl and do it again. Keep adding flour and folding it in, a little bit at a time, in about 4—6 additions. Don’t over-mix. The goal is to combine the ingredients without deflating the whites.
Gently pour the batter into your tube pan, using the spatula to get all of the batter from the bowl. Smooth the top and run a knife through the batter to eliminate any air bubbles. Bake the cake for about 40—45 minutes until a tester comes out clean.
When the cake is done, remove it from the oven and immediately turn it upside down to cool. If your tube pan has feet, great. If not, you can slip it over the neck of a wine bottle. Allow the cake to cool completely, for at least two hours. To remove it from the pan, set it right-side up and run an offset spatula or blunt knife around the outer perimeter and around the center tube as well. Then invert it onto a cake plate and gently lift off the bottom, if necessary.
Using a mesh strainer, dust the top with confectioner’s sugar if desired.
Angel food cake should be cut using a serrated knife, using a sawing motion, to keep it from collapsing. Serve slices topped with the Warm Amaretto Peach Sauce.
Angel food cake is best eaten the day it’s made. So, what to do if there are leftovers? You can wrap it well and store it in the fridge. It will still be good. In fact, a slice of leftover angel food cake, toasted and topped with ice cream and hot fudge is one of life’s most beautiful things. Or, use the day-or-two-old cake in an English trifle, turning all those leftover egg yolks into a silky custard.
Warm bourbon amaretto peach sauce
I’m a big fan of good bourbon. Don’t use it here, because everything good about it will be lost. Drink your good bourbon and get a cheap one for cooking—mind you, not total rot-gut; it needs to be drinkable. Because bourbon is sweeter than other whiskeys, it’s a natural here, and using brown sugar enhances that flavor.
When one thinks of Amaretto, Amaretto di Sarono comes first to mind. It’s the classic that every cheap, almond-flavored liqueur wishes it could be. Recently, while chatting with the proprietor of my local liquor store, I learned that Amaretto di Sarono is no longer made with almonds! They now use peach pits which have pretty much the same flavor but remove the issue of nut allergies. Hmmm! Go know!
He recommended another brand and said he likes it even more than the classic we all know. It was about half the price, so I took his advice and tried it. It is excellent! So, while I won’t dissuade you from sticking to the tried and true, you might want to try Lozano Amaretto. I’m hooked.
That said, it’s the perfectly ripe, juicy peaches that are the star here. Look for peaches that have some give when prodded, but aren’t too soft. You want them to be able to hold up to cooking.
In a pinch, you can use frozen sliced peaches.
Ingredients:
6 ripe, but firm peaches
¼ cup amaretto
½ cup bourbon
¾ cup brown sugar (you can use light or dark)
1 teaspoon vanilla bean paste (or vanilla extract)
2 tablespoons cornstarch
Method:
Put up a big pot of water to boil. Once merrily boiling, drop in your peaches and let them bob around for 1—2 minutes; then remove them with a slotted spoon. This makes the skins slip right off.
Break the peaches in half and remove the pits, then slice them. Be sure to preserve any juices from the peaches. (You can leave the skins on if you prefer, but I personally don’t love having them in the sauce.)
In a medium sauce pan, combine the amaretto*, the bourbon, and the brown sugar with ¼ cup water. Cook it, stirring, until the sugar is melted.
Add the sliced peaches with any preserved juices and stir the pot carefully so as not to break the fruit. Bring the sauce to a rolling boil and let it boil for a minute, to cook off the alcohol. Then turn the heat down to medium.
In a small dish, add a tablespoon or so of water to the cornstarch and stir until it’s dissolved. Pour the slurry into the pot with the peach sauce, and cook, stirring constantly, to thicken the sauce. The sauce will go cloudy at first when you add the slurry, but will then clear and become shiny when the cornstarch is cooked. Bear in mind that the sauce will continue to thicken as it cools. You must stir constantly or your sauce will go lumpy.
Remove the pot from the heat and stir in the vanilla. Allow the sauce to cool until it’s just slightly warm, and serve it spooned over slices of angel food cake.
*If you use the liquors as instructed, the alcohol will cook out while leaving behind their flavor.
But you’re serving an “over 21” crowd and want the sauce to retain a bit of a boozy kick, leave out the amaretto until the sauce is cooked, then stir it in with the vanilla.
Did you make it? Was it fabulous?